Inventory management is one of the essential features that allows you to control stock levels in WooCommerce. In this article, we explain how to efficiently manage product quantities and what to focus on in an online store.
Enabling Inventory Management
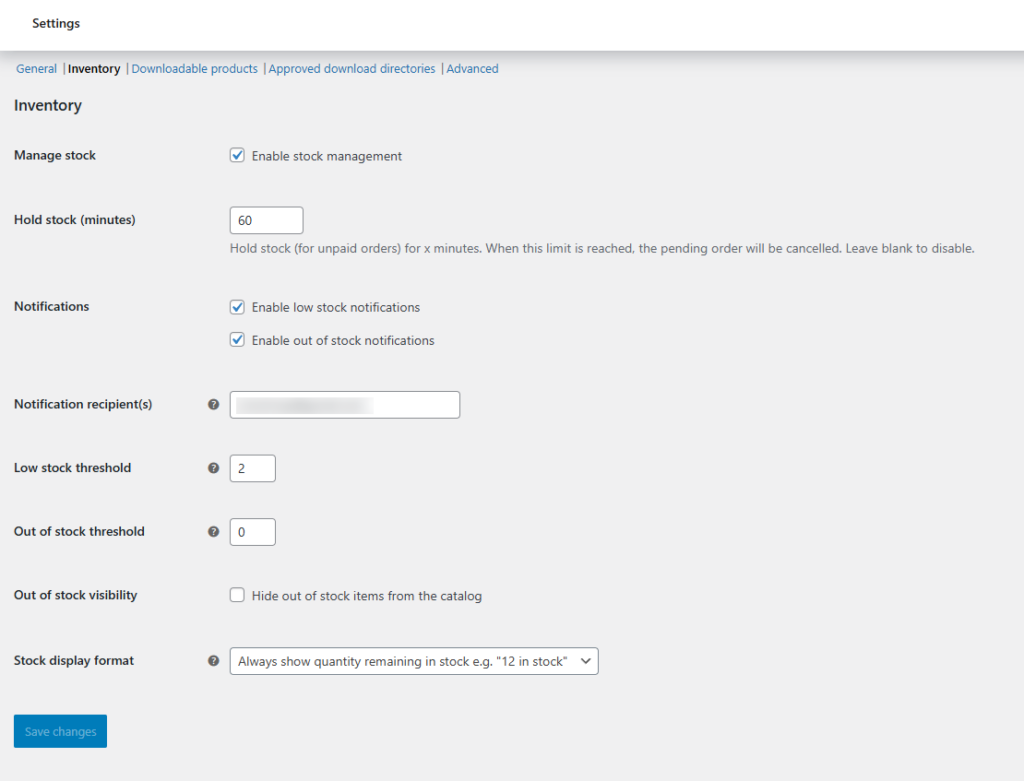
To enable global inventory management, go to WooCommerce > Settings > Products > Inventory and check Enable inventory management:
Here, you can configure options such as:
- Holding inventory for unpaid orders
- Notification settings (including setting the recipient for alerts)
- Defining low stock and out-of-stock thresholds
- Hiding out-of-stock products
- Managing inventory display settings

You can also manage inventory at the product level. Once inventory management is enabled, you can set the available stock for each product, decide whether it can be backordered when inventory reaches zero, and configure low-stock notifications.
Managing Inventory for a Single Product
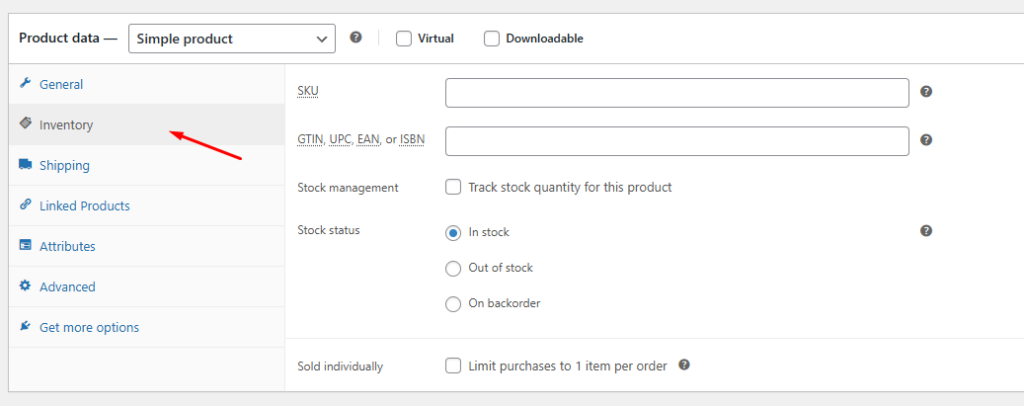
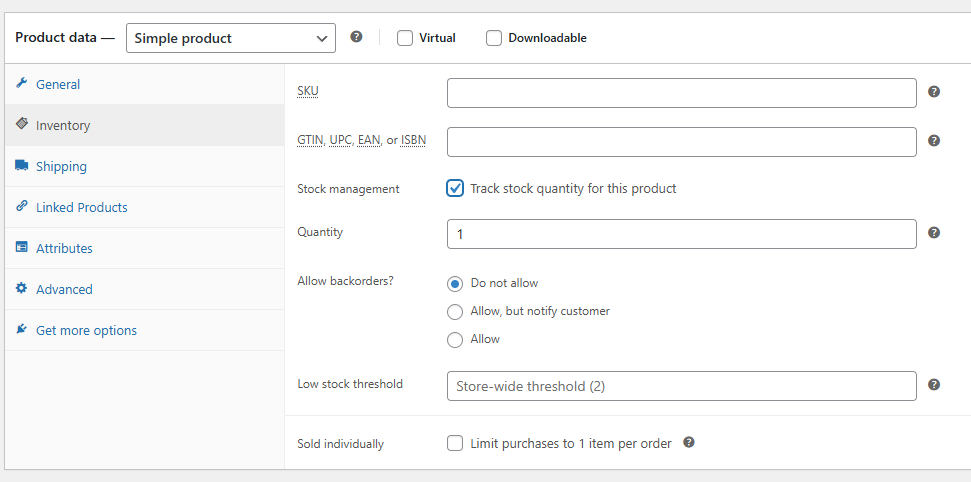
Detailed inventory settings can be found in the Inventory section when editing a product:

You can enable inventory management to specify the exact quantity of available products.

Inventory Management in WooCommerce
Effective inventory management helps streamline e-commerce operations. WooCommerce automatically deducts sold items from the inventory count but does not have a built-in feature to increase stock levels upon restocking. If you are not using an additional plugin (e.g., for dropshipping), you will need to update inventory levels manually.
Additionally, email notifications help track stock levels and restocking needs. You can also choose whether to display inventory status to customers, which can influence purchasing decisions.
- Customer reviews in WooCommerce - February 23, 2025
- Additional Product Labels in WooCommerce - February 18, 2025
- Shipping Zones in WooCommerce - February 18, 2025

