The structure of the WooCommerce plugin allows you to assign products to the appropriate category. Product categories work similarly to post categories:
- they are hierarchical,
- they can be created freely according to your needs,
- we can assign an infinite number of products to them.
We can easily add categories to the page menu, thanks to which we provide the customer with quick access to the products they are looking for. A well-designed and implemented taxonomy allows you to significantly increase sales – the customer knows where to effectively look for what they need.
Creating your own category in WooCommerce
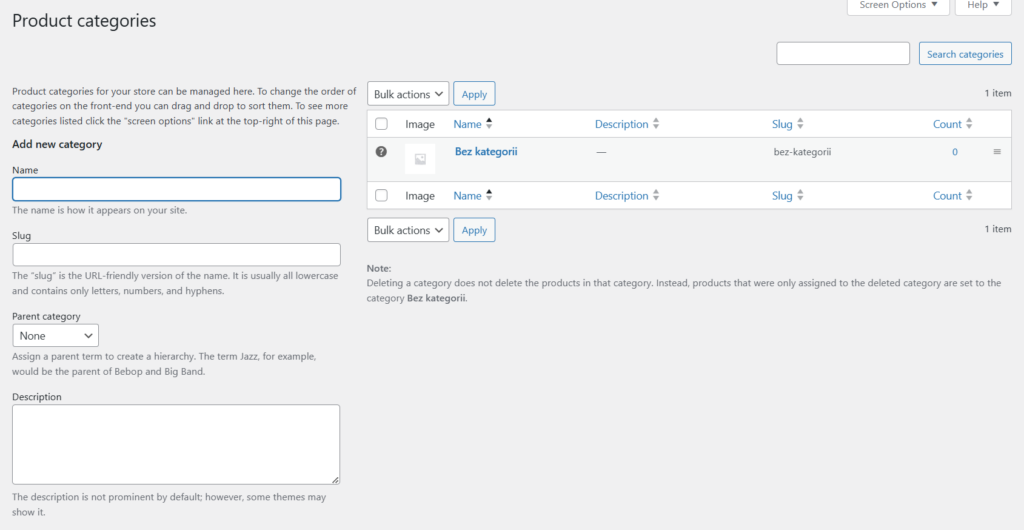
To add your own product category, after installing and activating the WooCommerce plugin, go to the categories section:

We can add a product category name (e.g. clothing), and also edit the slug if necessary. We can also select a parent category – this will create a category hierarchy.
The category description is a description that, depending on the theme, can be displayed on a subpage of a given category. Due to search engines, it is worth filling it out.
Displaying product categories

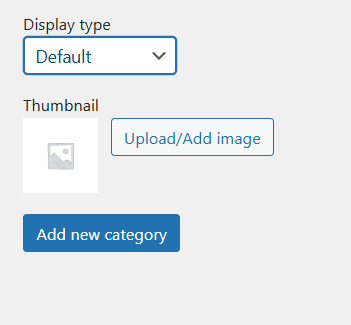
On the product page, we can also set how the category subpage should look. Should it be displayed by default (according to the global WooCommerce settings), or should we display subcategories, products, or subcategories and products? For example, if we select only products, a person entering the subpage of a given category will immediately see products for purchase without division into subcategories, even if they exist. In other words, the right choice depends on the structure and development of the store.
Additionally, we can set a category thumbnail – this will be useful if we want to display categories graphically somewhere on the page. It is important that the thumbnails have the same format and are legible.
Adding a product category to the page menu
To add a product category to the page menu in classic (not block) WordPress theme, we must first go to Appearance and Menu in the Dashboard, and then click the Screen Options button visible in the upper right part of the page. Then we will be able to (after expanding) select the Product Categories option. Thanks to this, the option to select WooCommerce product categories will appear in the drop-down menu on the left.
In the case of the block editor and FSE (Full Site Editor), we simply insert the appropriate link into the block, thereby building the menu. The block editor for the navigation menu works similarly to when editing a page or post.
Categorizing products is one of the basic functions of WooCommerce. When creating your first online store, it is worth remembering about transparency, short and readable category names and an intuitive division for the customer. Thanks to this, we will certainly increase our sales.
- Endpoints in WooCommerce - February 25, 2025
- Product sorting in WooCommerce - January 23, 2025
- Featured products in WooCommerce - January 21, 2025

