
Often, when creating our website, we reach the point where there is a need to configure a contact form, whether it is for inquiries about offered services, submitting cooperation proposals, or, for example, sending order confirmations in our online store. At this moment, a question may arise: “What sender address should I use and where should I provide it for such messages?”
In the following post, we will explain this issue based on examples of the most popular contact forms.
WooCommerce (WordPress)
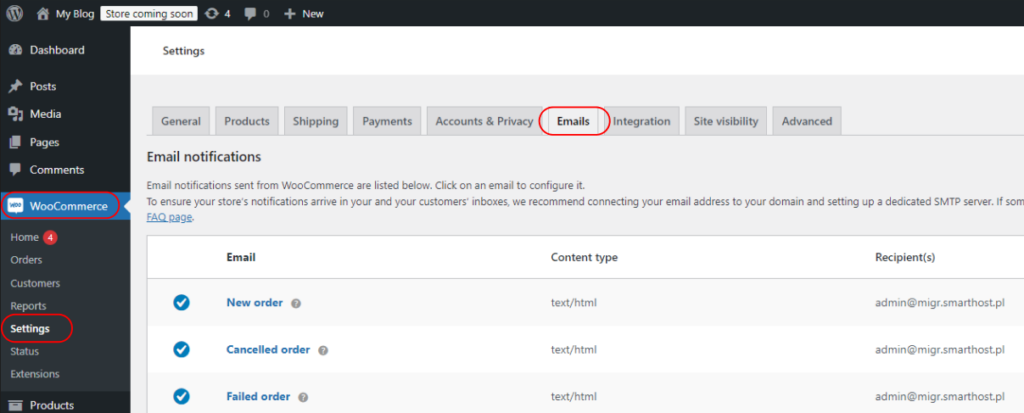
In one of the most popular e-commerce plugins, WooCommerce, to configure the sender address, you need to select WooCommerce > Settings > Emails from the menu on the left.
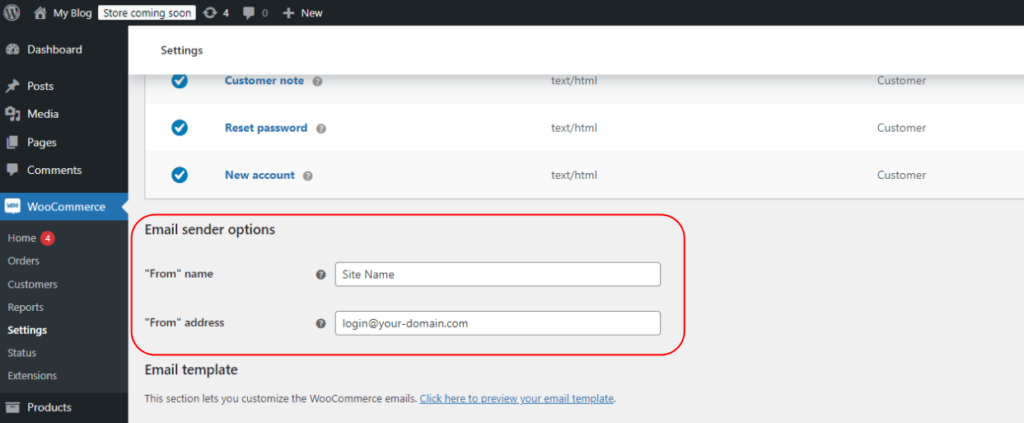
Next, at the bottom of this tab in the “Email sender options”, you need to enter your “From” name, which could be the name of your website and the “From” email address, which will be the email address displayed as the sender of all messages.
PrestaShop
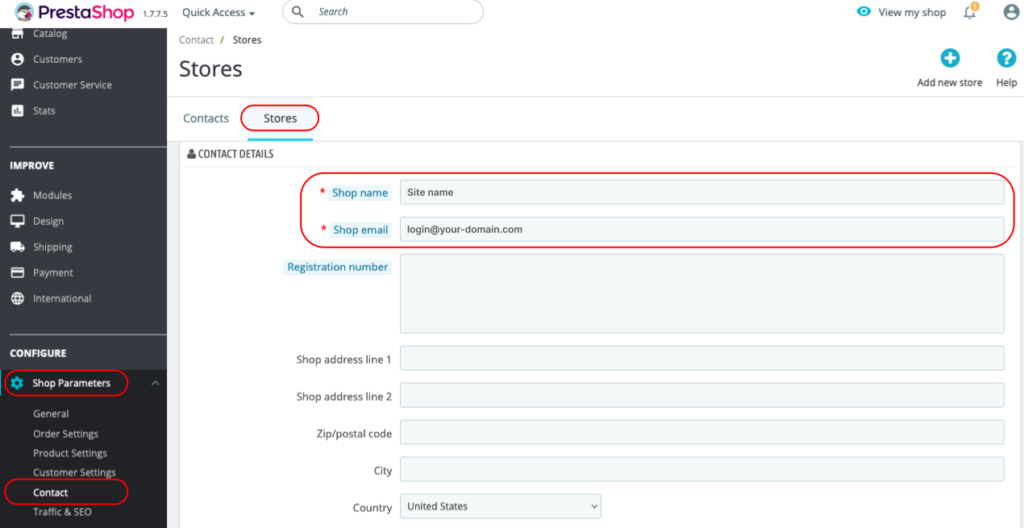
Configuring the contact form in PrestaShop is equally intuitive. After logging into your store’s backend, navigate to Configure > Shop Parameters > Contact. Then, select the Stores tab. In this tab, under the Contact Details section, you need to fill out the first two fields with your store’s name and email address.
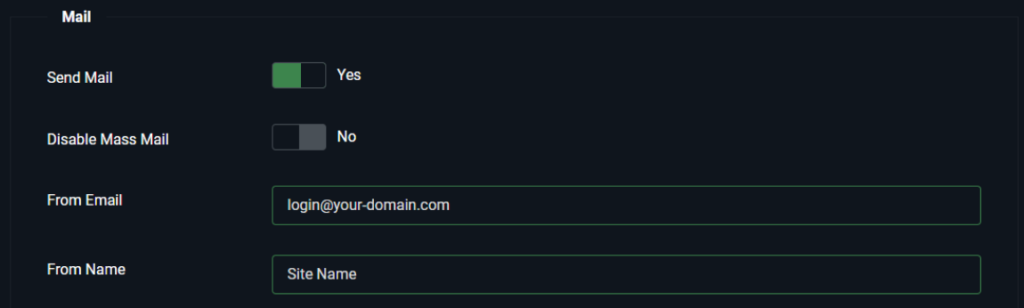
Joomla
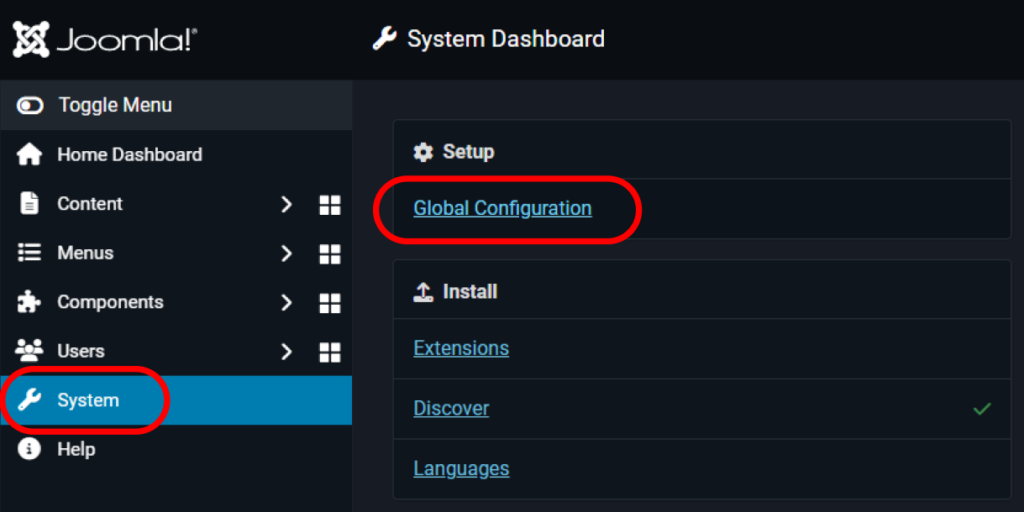
In Joomla, to properly configure the contact forms, log in to your website’s backend, then select System from the top panel and navigate to Global Configuration from the dropdown menu.
After navigating to these settings, select the Server tab.
Then, in the Mail section, fill in the Send From Email field with your email address created under the domain of the website, and in the Sender Name field, enter the name of your website.

- DNS Anycast – What It Is And How It Works - November 26, 2024
- DNSSEC – basic information. - September 29, 2024
- Fake e-mails from hackers and other dangerous messages. - September 29, 2024